
Are you tired of waking up in a messy room? Wondering why your bedroom never feels restful? Frustrated by constant clutter that drains your energy and focus? The real issue might not be your furniture—it’s your bedroom cleaning routine. Poor bedroom hygiene impacts not just how your room looks, but how you feel and function every day.
A proper bedroom cleaning strategy goes beyond sweeping and vacuuming. It’s about transforming your space into a restful, clean, and organized sanctuary where you can recharge physically and mentally. With expert techniques and thoughtful organization, you can reclaim your room and make it the healthiest place in your home.
If you’re serious about elevating your sleep environment and overall wellness, learning the fundamentals of effective bedroom cleaning is the perfect place to start. This guide will walk you through everything you need to know.

Benefits of a Clean Bedroom
A clean bedroom is much more than a visual delight. It directly influences how we sleep, how we feel, and how we function. When your bedroom is clean, everything from your breathing to your mood improves. This isn’t merely psychological—it’s biological and environmental. Many sleep experts, therapists, and allergists agree that cleanliness is a powerful tool for mental health and physical wellness.
By understanding the direct benefits of maintaining a clean sleeping space, you can reframe cleaning not as a chore, but as a self-care ritual that fuels better living.
Improve sleep quality
When your bedroom is free of clutter, dust, and grime, your body and mind both experience less stress. A messy room sends subconscious signals of disorder and unfinished tasks, making it harder for your brain to relax. Cleanliness reduces visual noise and sets the stage for deep, uninterrupted sleep.
In addition, clean sheets, fresh air, and a dust-free environment help regulate body temperature, minimize allergens, and reduce respiratory disturbances—all of which contribute to better sleep efficiency.
Increase relaxation
Your bedroom should be a sanctuary. A clean space helps you unwind and decompress after a long day. Clean surfaces, neatly arranged items, and a pleasant smell signal safety and order, promoting calm and reducing cortisol levels.
The act of cleaning itself, when done mindfully, can also become meditative. It’s a process of creating control and calm—two elements necessary for relaxation.
Healthier air quality
Dust, mold, pet dander, and pollutants can accumulate in an unclean bedroom, impacting indoor air quality. Poor air quality contributes to headaches, fatigue, and long-term respiratory issues. When you vacuum regularly, clean your bedding, and keep clutter to a minimum, you reduce allergens significantly.
Reduced stress
Scientific research shows a link between clutter and increased stress hormones. The visual reminder of disorganization triggers anxiety and an underlying sense of unease. By establishing a regular cleaning routine, you create a peaceful environment that supports emotional regulation and mental clarity.

Bedroom Cleaning Steps
Proper bedroom cleaning involves more than quick fixes. A thorough process ensures all areas—both visible and hidden—are addressed. Cleaning in a systematic order avoids redundancy and ensures no area is overlooked. Below is an expanded guide on how to clean your bedroom thoroughly, step by step.

1. Start With Dirty Clothes and Bedding
This initial step is foundational and psychological. Removing dirty clothes and unwashed linens not only declutters your space but also removes built-up allergens, bacteria, and smells—resetting the room’s atmosphere.
How to execute this step thoroughly:
- Survey the entire room. Don’t just grab what’s on the floor—check the backs of chairs, the bedposts, corners, and inside the closet for laundry that’s out of sight but definitely not clean.
- Layered separation. Sort your laundry into separate piles or baskets:
- Whites (sheets, undershirts)
- Darks (sleepwear, leggings)
- Delicates (lingerie, soft blends)
- Bedding (pillowcases, duvet covers, comforters)
- Inspect before tossing. Check bedding for hidden stains or mildew smells and pre-treat them immediately.
Washing these items at a high temperature helps kill bacteria, mites, and odors. While the laundry is running, you can move on to other tasks. Remember, no cleaning job feels complete if your linens are still soiled.
Pro Tip: Use a gentle detergent with enzymes to break down sweat and skin oils, and always dry bedding completely before putting it away.

2. Make the Bed
Contrary to its simplicity, making the bed is both symbolic and practical. It marks the shift from night to day and gives the room a visually clean focal point.
Why this step matters beyond neatness:
- It creates immediate order.
- It reduces temptation to nap or lounge.
- It anchors your morning routine and builds discipline.
Steps to elevate your bed-making routine:
- Tuck the corners military-style for that tight, crisp hotel feel.
- Use a bedspread or duvet with structure so the bed holds form and looks elegant.
- Arrange pillows in layers:
- Sleeping pillows go behind.
- Decorative pillows in front.
- A lumbar or bolster pillow in the center for visual interest.
Textile tip: Iron or steam pillowcases and sheets occasionally to create that wrinkle-free luxury feel.
Arrange your pillows with care—sleeping pillows in the back, decorative ones in front. This daily habit signals mental organization and has a surprising psychological impact. Even if the rest of the room is not perfect yet, a well-made bed can make the entire room feel tidier.
3. Clean Light Fixtures
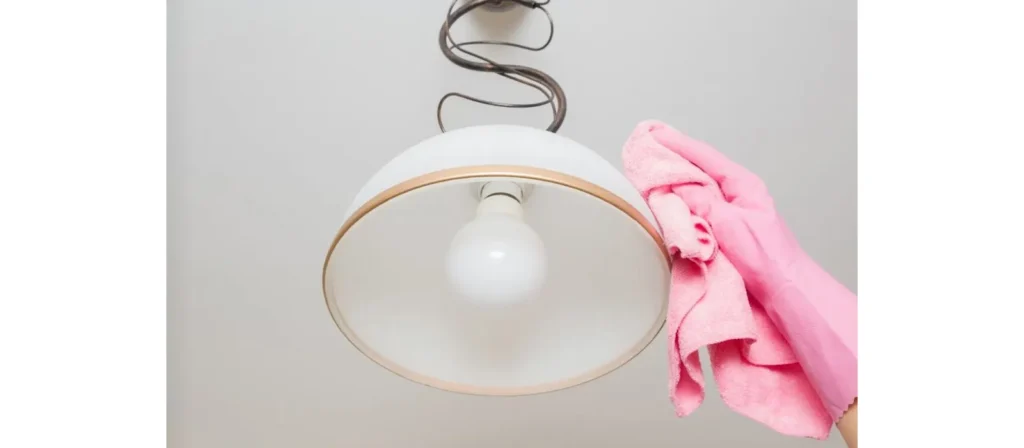
Light fixtures are often ignored but collect a surprising amount of dust and insects over time. Turn off all power sources before cleaning. Use a microfiber cloth or extendable duster to remove cobwebs and dust from fixtures, lampshades, or ceiling-mounted lights.
For glass or plastic light covers, remove and soak them in warm soapy water. Rinse and dry completely before reinstalling. If fixtures are too delicate to soak, wipe them down using a damp cloth and a small amount of mild cleaner. Avoid harsh chemicals which can cause discoloration or wear.
- Turn off the power and allow fixtures to cool completely.
- For glass globes or plastic covers, remove them and soak in warm soapy water. Rinse and dry thoroughly.
- Use a microfiber cloth or duster to remove surface dust from chandeliers, sconces, and bulbs.
- For fabric lampshades, use a lint roller or vacuum brush to clean without damage.
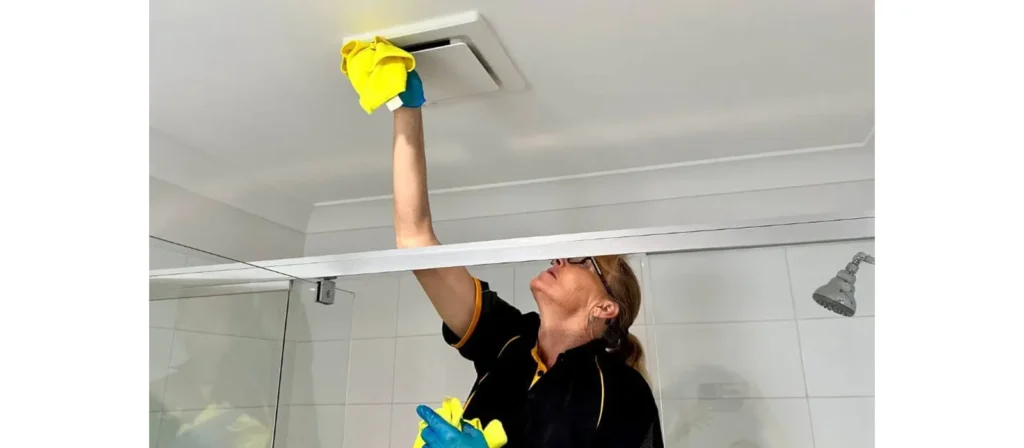
4. Scrub Ceiling Fans and Vents
Ceiling fans that distribute dust rather than fresh air are self-defeating. And dirty HVAC vents reduce air quality and efficiency.
What to use:
- An extendable microfiber duster for fans
- An old pillowcase for dust-trapping
- Vacuum cleaner with a brush nozzle
- Disinfectant wipes or a vinegar-water mix for finishing
Detailed process:
- Place the pillowcase over a fan blade.
- Pull it back while pressing to collect dust inside the case.
- Wipe with a damp cloth to remove residue.
- Vacuum vents, then wipe clean.
- Change or clean your HVAC filters if applicable.
Clean fans and vents are essential for anyone with allergies or respiratory sensitivities, and they make the room feel instantly “lighter” and fresher.
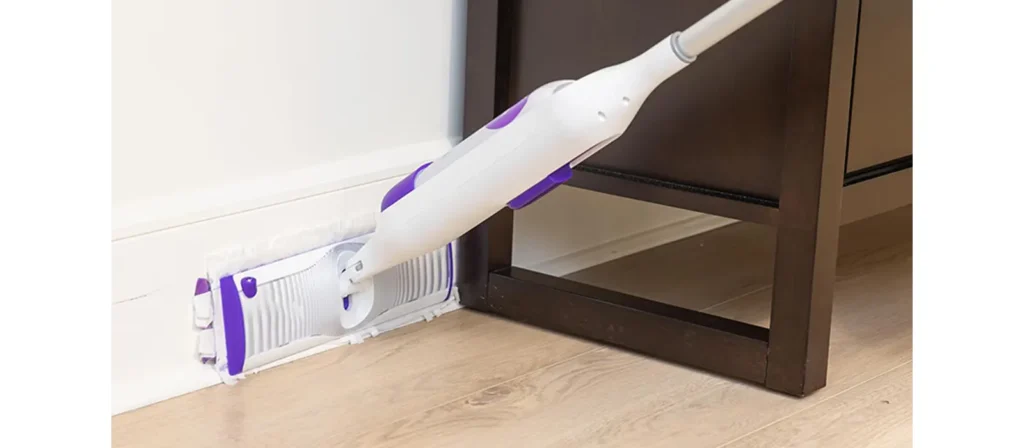
5. Vacuum and Clean Floors, Under the Bed, Baseboards
Floors are the central staging ground for debris, and leaving buildup unattended contributes to a dingy smell and a restricted air environment. Begin by clearing the area of small bedroom furniture, vacuum thoroughly using extension tools to reach baseboards and carpets. For under-bed spaces, use flat or telescoping wand attachments—these remove hidden dust bunnies and pet fur swirls. Hard floors benefit from a second pass with a damp microfiber mop plus a floor cleaner specific to their material.
Baseboards tend to collect dust that isn’t always obvious until wiped. Use a lightly damp cloth or sponge—mix mild detergent with water—and scrub gently along the edges. Dry thoroughly to prevent warping or mildew. The combined effect? A visually cleaner room, fresher air, and floors that don’t smell musty or sticky to bare feet.
Flooring Types:
| Floor Type | Cleaning Approach |
|---|---|
| Hardwood | Damp mop with wood-safe cleaner |
| Carpet | Vacuum in two directions for deep clean |
| Tile | Scrub with mild detergent and microfiber mop |
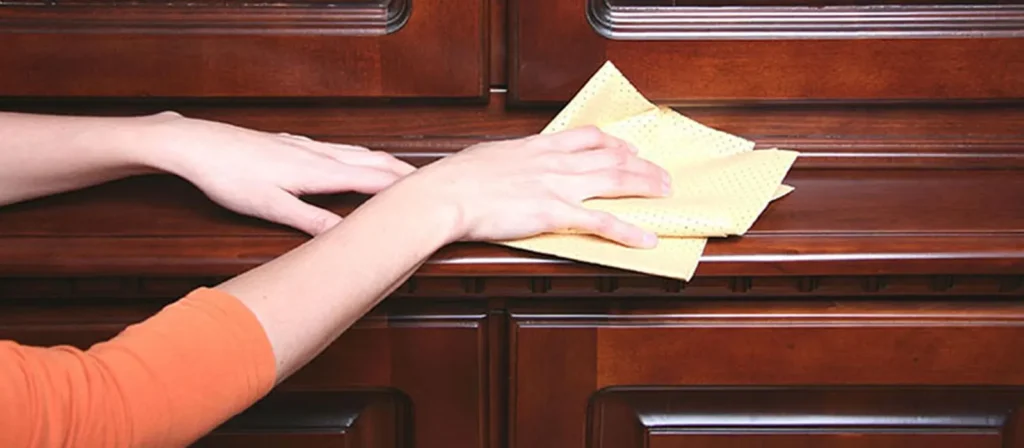
6. Remove Dust from Furniture
Dust settles not only on surfaces but in nooks and crevices. After clearing nightstands, dressers, bookshelves, and desks, start with a dry microfiber cloth or electrostatic duster. Work from top to bottom: shelves, ledges, picture frames, decorative items, and flat surfaces deserve attention. Use detail brushes or compressed air in tight parts like drawer tracks and behind electronic devices. After initial dusting, lightly mist with furniture polish or a wood-safe cleaner, then buff in grain to restore sheen.
Breakdown by furniture type:
- Wooden furniture: Use a slightly damp cloth followed by dry wiping. Apply polish for shine and protection.
- Upholstered headboards: Vacuum with a soft brush tool to lift dust and hair.
- Glass/mirrored pieces: Spray a cloth (not the surface) with a vinegar-glass cleaner and wipe streak-free.
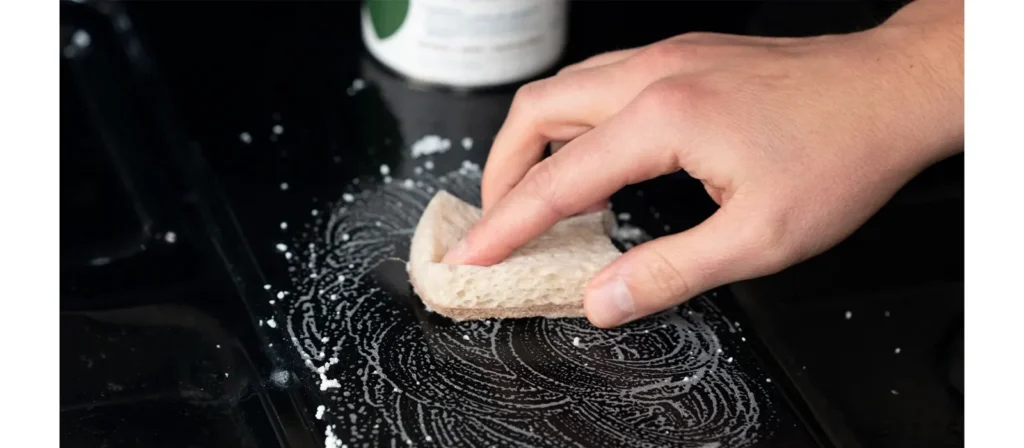
7. Scrub All Surfaces with Disinfectant
While dusting tackles allergens, disinfecting kills pathogens on contact. Focus on high-touch areas: knobs, handles, switches, drawer pulls, headboard buttons, alarm clocks, and remote controls. Select a disinfectant suitable for the material—check compatibility for wood, plastic, or metal. Using microfiber or disposable wipes, clean each touch point thoroughly and allow air-dry time to ensure efficacy.
Furniture surfaces and electronic screens require diluted disinfectant sprayed on a cloth first, never directly. This hygienic step minimizes germs during flu seasons and keeps your bedroom a healthier environment. Don’t neglect containers, bins, or décor you handle frequently. Disinfection complements cleaning by reducing microbial load, creating a truly sanitized space.

8. Wash Windows, Window Sills, Mirrors
Light enters your room through windows and mirrors—and dirt dulls that effect. Begin by vacuuming sills and frames to remove loose debris. Prepare a cleaning solution of warm water and mild detergent or a 1:1 vinegar-water mix. Use a sponge to wipe frames, tracks, and glass edges before washing panes thoroughly. Buff with a squeegee or lint-free cloth to prevent streaks. Don’t forget insect screens: remove, wash them with soap, rinse and dry before reinstalling.
Mirrors can be cleaned simultaneously; spray cleaner on cloth and wipe in circular motions to avoid residue. Clean glass enhances brightness and depth and ensures the overall space feels polished. A clear window also improves mental well-being by maximizing natural light and connection to the outdoors.

9. Clean and Organize Closets
Closets are often overlooked until they overflow. A disorganized closet can negate all other bedroom cleaning efforts.
Decluttering Categories:
- Keep (you love and use it)
- Donate (still in good shape)
- Trash (worn out or damaged)
The Deep-clean Approach:
- Empty everything onto the bed.
- Vacuum and wipe down the empty closet.
- Organize by category (shirts, pants, accessories).
- Add vertical storage and bins for easy access.
Closet Tools
| Tool | Purpose |
|---|---|
| Velvet hangers | Space-saving, prevents slipping |
| Stackable bins | Store shoes, scarves, out-of-season |
| Hanging shelves | Sweaters, jeans, purses |
| Drawer dividers | Organize socks, undergarments |
Use storage aids like labeled bins, uniform hangers, shoe racks, and under-shelf baskets. Group clothes by type and color. Seasonally rotate—store winter coats in garment bags when not in use. Label containers so you always know where everything belongs. Consider using cedar blocks or breathable sachets to deter pests and add a pleasant scent. A polished, systematic closet makes dressing effortless and keeps clutter off the floor and surfaces.

10. Dealing with Bedroom Odors
No matter how clean a room looks, persistent odors can ruin the atmosphere. Tackling smells is the final phase of Bedroom Cleaning—and one that requires both cleaning and preventative measures. First, identify the source: is it dirty laundry, pet dander, mildew, or stale air?
Odor elimination strategy:
- Wash all fabrics: bedding, curtains, and throw pillows.
- Use activated charcoal in hidden corners to absorb smells.
- Sprinkle baking soda in shoes, drawers, and under the bed.
- Open windows for at least 10 minutes daily.
- Refresh upholstery with fabric spray or essential oils.
DIY linen spray:
- 1 cup distilled water
- 1 tbsp witch hazel
- 10 drops lavender oil
- Shake and spritz lightly on bedding
Air purifiers with HEPA filters catch fine particles and odor molecules. For persistent ghost smells, check hidden areas like under furniture, behind dressers, or around room corners where moisture or spillage might linger. A truly clean bedroom looks spotless and invites relaxation with each breath.

Establish Bedroom Cleaning Habits
A clean bedroom doesn’t result from a one-time deep clean—it comes from consistent, scheduled upkeep. By setting regular routines, you keep messes small, maintenance simple, and cleaning stress-free. Building habits not only ensures a sanitary space but also strengthens your relationship with your environment, turning your bedroom into a genuine refuge.
Below are structured schedules for daily, weekly, and monthly cleaning, each introduced with context and followed by easy-to-follow breakdowns.
Daily Bedroom Cleaning Schedule
Daily bedroom cleaning helps prevent messes from escalating and keeps your space fresh with minimal effort. These tasks are quick—many take less than 10 minutes—but they have an outsized impact on how your room feels.
Doing a few things each day eliminates the need for a time-consuming weekend clean. More importantly, it reinforces the idea that cleanliness is a daily norm rather than a sporadic crisis.
Daily Cleaning Goals:
- Restore order after sleep and daily use.
- Keep surfaces clear.
- Promote healthy air and sleep hygiene.
Daily Cleaning Tasks Table:
| Task | Time Required | Details |
|---|---|---|
| Make the bed | 2–3 minutes | Smooth sheets, fluff pillows, align blankets |
| Put away clothes | 3 minutes | Return clean clothes to closet, dirty to hamper |
| Tidy surfaces | 2–3 minutes | Clear nightstands, dressers, and floors |
| Spot-clean visible dust | 2 minutes | Wipe surfaces like dressers or electronics |
| Quick floor sweep/vacuum | 3–5 minutes | Especially for high-traffic or pet-filled rooms |
Weekly Bedroom Cleaning Schedule
A weekly cleaning schedule allows you to dig deeper and address the things that accumulate more gradually—dust, smudges, allergens. It’s the ideal time to reset your space for the week ahead.
These tasks may take 30–45 minutes, but they significantly improve the cleanliness and comfort of your room. Pick one day each week (e.g., Sunday mornings) to complete this list.
Weekly Cleaning Goals:
- Remove allergens and dust.
- Reset organization systems.
- Tackle odor control.
Weekly Cleaning Tasks Table:
| Task | Recommended Tools | Time Estimate |
|---|---|---|
| Change and wash all bedding | Laundry detergent, hot water | 30–40 minutes |
| Dust all surfaces | Microfiber cloth, dusting spray | 10–15 minutes |
| Vacuum floors and under furniture | HEPA vacuum, crevice tools | 20 minutes |
| Empty and wipe trash bins | Disinfecting wipes, trash bags | 5 minutes |
| Wipe light switches and door knobs | Disinfectant spray or wipes | 5 minutes |
| Organize clutter zones | Storage bins, baskets | 10–15 minutes |
Monthly Bedroom Cleaning Schedule
Monthly cleaning is where you tackle areas often overlooked in daily or weekly routines. Think of it as preventative care for your bedroom—the more consistently you do this, the less frequently you’ll need heavy-duty cleans.
These tasks will take 1 to 2 hours and can be broken up over a weekend.
Monthly Cleaning Goals:
- Deep-clean large surfaces and hidden areas.
- Address storage and rarely touched items.
- Rotate seasonal and less-used objects.
Monthly Cleaning Tasks Table:
| Task | Special Notes |
|---|---|
| Wash pillows, mattress pads | Check labels—some need special care or air drying |
| Clean ceiling fans and light fixtures | Use a ladder and cloth or pillowcase cleaning method |
| Vacuum mattress | Add baking soda and vacuum thoroughly |
| Clean window sills, tracks, blinds | Use old toothbrush and gentle cleaner |
| Reorganize and declutter closet | Donate unused clothing, rotate seasonal items |
| Check for signs of mold or mildew | Especially near windows, in corners, or by A/C vents |
| Launder decorative pillow covers | Wash or vacuum, depending on fabric type |
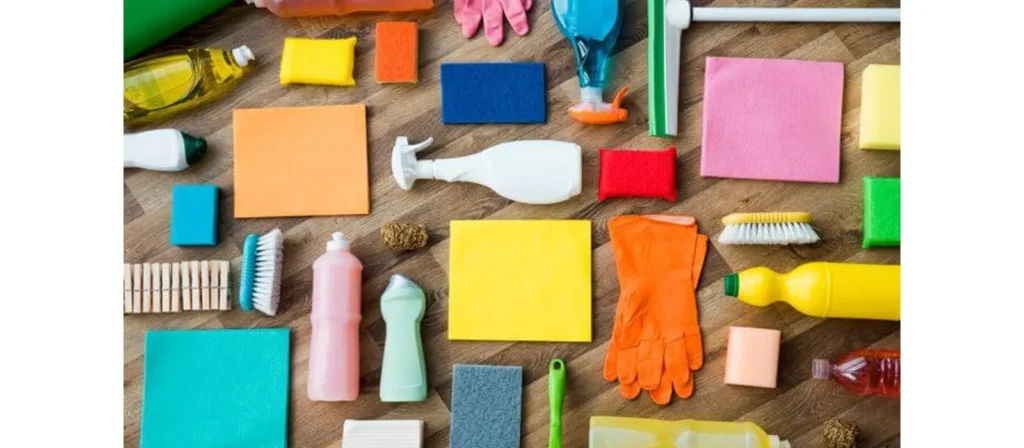
Must-Have Cleaning Tools for the Bedroom
A well-equipped cleaning setup ensures your Bedroom Cleaning routine is efficient and thorough. Here are essentials every cleaner should have:
- Microfiber cloths: Trap dust without spreading it
- All-purpose cleaner: For general surface cleaning
- Glass cleaner: For windows and mirrors
- Vacuum with HEPA filter: Essential for carpeted bedrooms
- Upholstery brush: For mattresses and soft furniture
- Broom and mop: For non-carpeted floors
- Storage bins: For organizing closets and under-bed items
- Laundry baskets: Keep dirty clothes separate from clean areas
- Rubber gloves: Protect hands during chemical use
Investing in proper tools means less effort and better results during every Bedroom Cleaning session.

How to Clean Bedroom Decor?
Decor often enhances a room’s aesthetic but is also a magnet for dust and grime. Whether it’s upholstered headboards, cushions, or wall art, regular cleaning ensures your decorative items stay beautiful and hygienic.
1. Choose the Right Tools
Use soft, non-abrasive cloths for cleaning surfaces to prevent damage. For more delicate items like framed prints or ceramics, use a microfiber cloth and a gentle touch. Avoid soaking decor—light misting is often sufficient.
Vacuum attachments with soft bristles are ideal for textiles like wall hangings or decorative pillows.
2. Vacuum the Sides
Sideboards, bed frames, and the sides of nightstands often go unnoticed. Use a crevice or upholstery tool to vacuum along the edges. Dust settles there and affects air quality over time.
Step-by-Step:
- Attach the soft brush head to your vacuum.
- Begin from the top and move downward in slow, overlapping strokes.
- Focus on seams and buttons—dust and lint often gather there.
- Use a lint roller afterward to catch any remaining debris.
Don’t forget the back sides of decor placed close to walls—these spots harbor dust and even insects if left unchecked.
3. Vacuum the Cushions
Pillows and upholstered decor collect dust, hair, and skin particles. Use a handheld vacuum or vacuum with an upholstery tool to clean them weekly.
For deeper cleaning, check labels. Some can be machine-washed; others may require spot treatment or dry cleaning. Regular vacuuming extends their life and keeps them allergen-free.
- Remove any covers that are machine washable and wash separately.
- For non-removable covers, vacuum all surfaces.
- Pay special attention to corners and where pillows meet seams.
- For a refresh: lightly mist with a fabric-safe deodorizing spray.
4. Clean the Bottom
Whether it’s the base of a vase, the feet of a lamp, or the underside of a shelf, bottoms accumulate grime. Turn items over and wipe them clean. You’ll be surprised how much dust is hidden out of sight.
Hidden Dust Zones to Check:
- Under benches or ottomans
- Behind wall-mounted art or shelves
- Beneath floating nightstands
- Between furniture and the wall
Quick Process:
- Use an extendable duster or a slim vacuum nozzle.
- Wipe down surfaces with a damp cloth if accessible.
- Use a flashlight to inspect for buildup in tight corners.
This step may seem minor but contributes to an overall feeling of freshness and completeness in your cleaning routine.

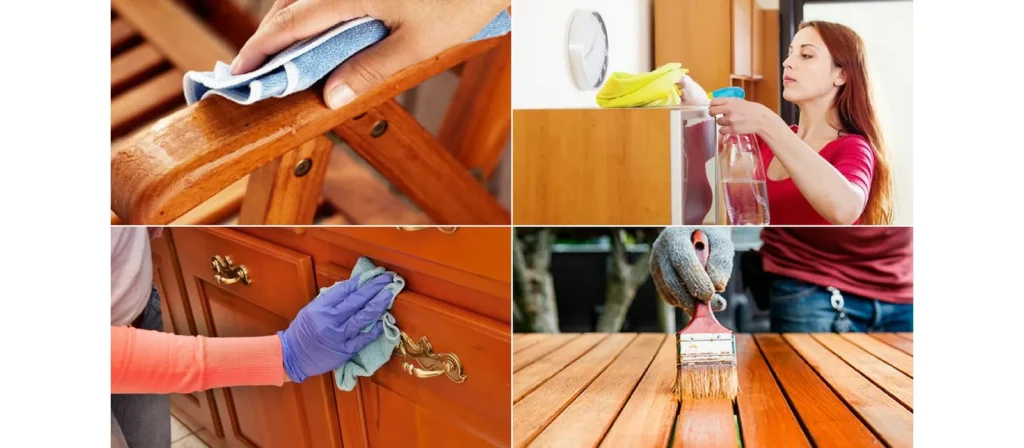
Bedroom Furniture Care Guide
Furniture care is an often neglected yet essential aspect of maintaining a clean and functional bedroom. Well-maintained furniture not only looks better but lasts longer and contributes to a healthier living space. Each material type and design requires a tailored approach to cleaning, conditioning, and preservation.
General Cleaning and Dust Removal
Start with regular dusting. Use microfiber cloths to gently lift dust off surfaces without scratching. For intricate details, such as carved edges or metal handles, use a small brush or an old toothbrush to dislodge dirt.
Clean surfaces weekly to prevent buildup. Avoid dry cloths that may scratch polished surfaces or push dust into corners. Instead, lightly dampen your cloth for a more effective clean. Finish with a dry wipe to avoid moisture marks.
Wood Furniture Care
Wood needs special attention to maintain its integrity. Too much moisture can cause warping; too little care can result in dullness or cracking.
- Use a wood-specific cleaner or polish monthly.
- Avoid direct sunlight to prevent fading.
- Apply wax or oil (depending on the wood type) every few months for added protection.
Inspect your wood furniture for scratches or water rings. Light abrasions can often be repaired using furniture markers or gentle buffing techniques. Consistent care keeps wood surfaces looking refined and long-lasting.
Upholstered Furniture Care
Upholstered items such as headboards, benches, or chairs attract dust, hair, and body oils. These should be vacuumed weekly using an upholstery attachment.
For spot cleaning:
- Use a fabric-safe cleaner or mild soap solution.
- Test in a hidden area first.
- Blot stains—never rub.
Some fabrics may allow for steam cleaning or removable, machine-washable covers. Always follow manufacturer instructions.
Protect upholstery by limiting exposure to direct light, rotating cushions, and using fabric protectant sprays where appropriate.
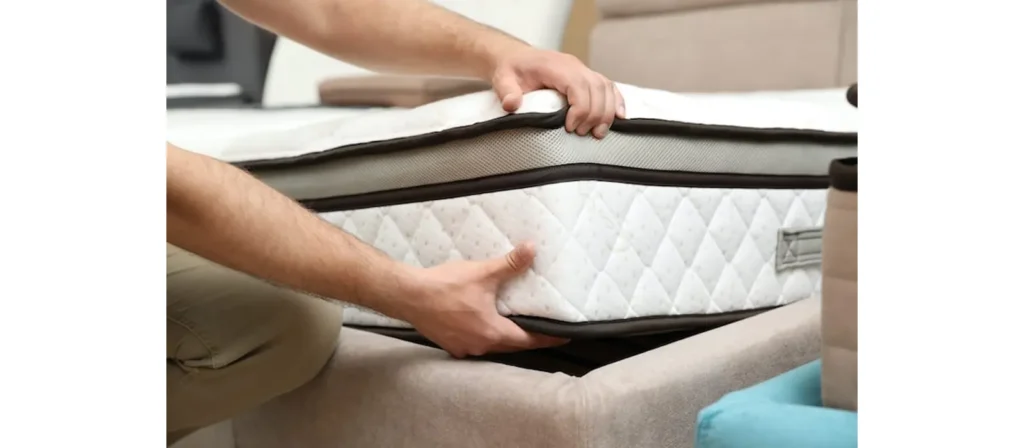
Mattress Care
Mattresses absorb sweat, dust, and skin cells, making regular care essential for both hygiene and longevity. Every month, vacuum the mattress surface thoroughly using an upholstery tool. Spot clean stains with a mild detergent and damp cloth.
Deodorize by sprinkling baking soda over the surface, letting it sit, and vacuuming thoroughly. Rotate your mattress every three months to ensure even wear. Use a waterproof mattress cover to protect against spills and allergens. Deep clean annually or as needed, and replace the mattress every 7–10 years.
Check Hardware Regularly
Inspect all furniture hardware—screws, hinges, knobs, and gliders—every few months. Loose components not only make furniture unstable but can also cause injury or damage over time.
FAQs
- Can I use vinegar to clean my bedroom?
Yes, vinegar is great for windows, mirrors, and even deodorizing mattresses and carpets. - How do I make bedroom cleaning fun?
Play music, set timers, and reward yourself afterward to make it less of a chore. - What’s the best way to keep dust away?
Vacuum frequently, use air purifiers, and dust with microfiber cloths to trap particles. - Should I vacuum or dust first?
Always dust first—this way any fallen debris can be vacuumed afterward. - What is the most efficient way to clean a bedroom?
Create a cleaning plan and follow a top-to-bottom, inside-out method—start with ceiling fixtures, then walls and furniture, and finish with the floor. - Is it necessary to clean under the bed?
Yes, it collects dust and allergens if ignored. - How often should I change my bed sheets?
It’s recommended to change your sheets at least once a week to prevent the build-up of dust, bacteria, and skin oils, ensuring a hygienic sleep environment. - What should I do if my pet sleeps in my bedroom?
Use a lint roller or vacuum to clean fur, wash pet bedding weekly, and run a HEPA air purifier to reduce allergens and maintain air quality.
Conclusion
Bedroom cleaning is not a one-time event—it’s a lifestyle shift. With structured routines, the right tools, and a positive mindset, transforming your space into a clean, calming sanctuary is absolutely achievable. So grab that vacuum, roll up your sleeves, and make your bedroom a place where serenity and sleep go hand in hand.