Is your upholstered furniture stained or smelling odd? Tried cleaning it yourself, but are you worried about damage or discoloration? Do you want to clean Upholstery like a pro without ruining your investment?
Clean Upholstery doesn’t have to be complicated. With the right approach and materials, anyone can restore their furniture to a fresh, hygienic state. Whether it’s fabric, velvet, or synthetic, understanding your upholstery and using gentle techniques will make all the difference.
Don’t waste money on professional services before trying these proven methods. I’ve used these Clean Upholstery tips on everything from home sofas to commercial seating—and the results speak for themselves.
Why Proper Upholstery Cleaning Matters?
Upholstery isn’t just fabric—it’s a surface you sit, sleep, and sometimes even eat on. Over time, it collects dust, dead skin cells, sweat, food particles, pet hair, and allergens. If not addressed, these impurities can make the upholstery not only look dull but also smell bad or even trigger allergies.
To Clean Upholstery properly means extending the life of your furniture while maintaining a healthier living space. Most homeowners wait until stains are visible before taking action, but proactive care prevents damage long before it’s visible.
Moreover, unclean upholstery degrades faster. Dirt particles grind into the fibers, weakening them over time. Moisture left from spills can lead to mold and mildew. That’s why you must Clean Upholstery regularly—because waiting too long may cost you the furniture itself.
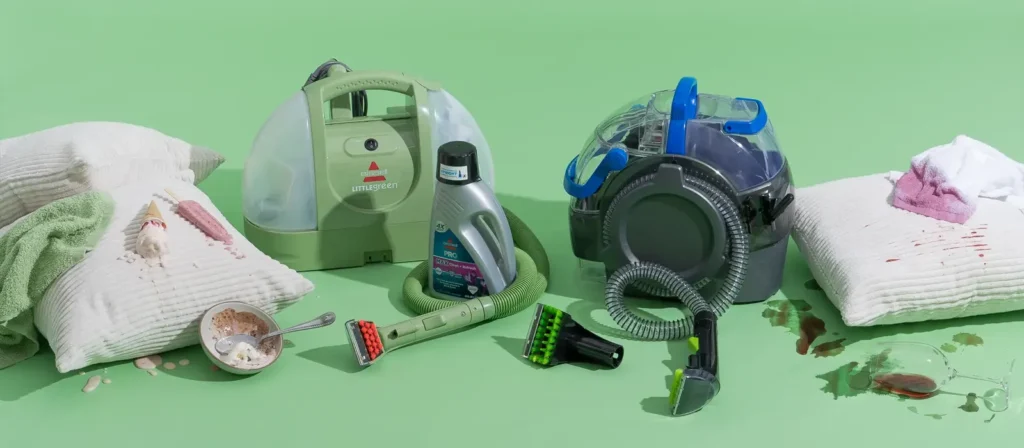
Tools You Need to Clean Upholstery
Before you start, having the proper equipment is crucial. Cleaning upholstery with the wrong tools can worsen stains or damage fabric. Here’s what you need to prepare.
Supplies
To Clean Upholstery effectively, always start with the right cleaning supplies. Depending on the type of fabric and the condition of the upholstery, these can vary, but some universal essentials include:
- Upholstery cleaner (store-bought or homemade)
- Distilled water (to prevent mineral stains)
- White vinegar
- Baking soda
- Dish soap (preferably clear and mild)
- Hydrogen peroxide (only for tough stains and light fabrics)
- Rubbing alcohol (for ink or dye stains)
- Cornstarch or talcum powder (for grease)
These ingredients are used for pre-treatment, stain lifting, and odor removal.
Tools
In addition to supplies, physical tools are essential to Clean Upholstery effectively and without abrasion. Prepare the following:
- Vacuum cleaner with upholstery attachment
- Spray bottle
- Microfiber cloths
- Soft-bristled brush
- Bucket for mixing solution
- Measuring cups/spoons
- Towels for drying
- Steam cleaner (optional for deep cleaning)
Things to Know Before You Start: Cleaning Codes
Not all upholstery is made equal. Cleaning without knowing the fabric’s care code is like walking blindfolded into a maze. Understanding these cleaning codes—usually found on a tag under the cushions or furniture base—prevents damage and directs you to the safest cleaning approach.
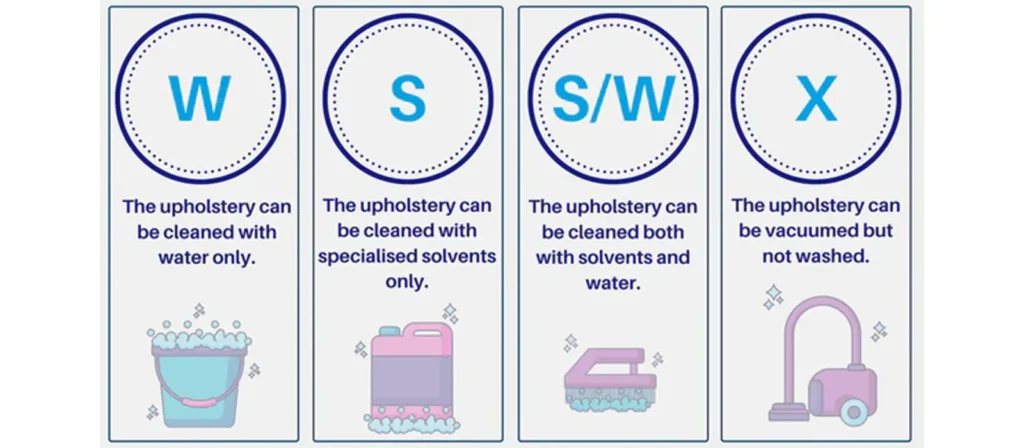
W – Water-Based Cleaner Only
This fabric can be cleaned with water-based solutions like mild dish soap and water. Steam cleaning and foam cleaners are typically safe. Common in synthetic fibers such as polyester or nylon, it allows greater flexibility for DIY cleaning.
S – Solvent-Based Cleaner Only
This fabric must not be exposed to water. It requires dry-cleaning solvents or alcohol-based products. Water may cause shrinkage, water stains, or dye bleeding. Often used in organic fabrics like rayon or cotton blends.
WS – Water or Solvent Cleaner
This is the most versatile and forgiving fabric tag. You can use either water-based or solvent-based cleaners. It’s still wise to spot-test in an inconspicuous area, especially with colored fabrics.
X – Vacuum Only
This code means the upholstery is highly delicate. You must not use any liquid cleaner. Only vacuuming or professional cleaning is recommended. Typically found in luxury materials such as silk or heavily textured weaves.
Misinterpreting these codes can ruin your upholstery. Always check before applying any solution.
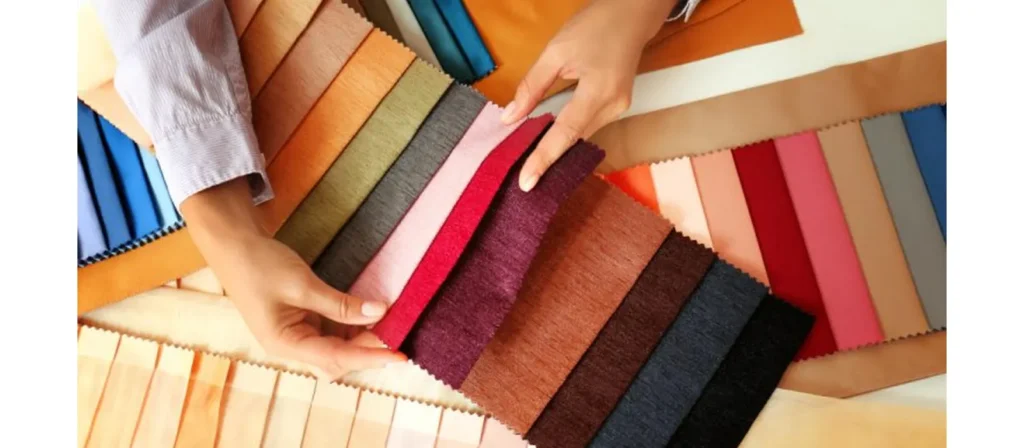
Identify the Type of Upholstery You’re Cleaning
Different types of upholstery fabric require different cleaning methods. Identifying what you’re dealing with is a crucial first step.
Common fabric types include:
- Cotton: Soft and breathable but prone to shrinking. It can often be cleaned with water-based products.
- Linen: Natural and eco-friendly but absorbs moisture easily and wrinkles.
- Microfiber: Durable and stain-resistant. Usually easy to Clean Upholstery with water-based cleaners.
- Velvet: Luxurious but high-maintenance. Requires gentle solvents and professional care.
- Leather (real or faux): Requires special leather cleaners. Avoid water unless the cleaner is specifically formulated for leather.
- Suede and Nubuck: Extremely sensitive to water. Only clean with dry methods or specialty suede cleaners.
Run your hand across the fabric. Does it feel slick, fuzzy, or tightly woven? This tactile check can help guide your cleaning choice if the label is missing.
Never Clean Upholstery without confirming the material type—what works for microfiber might ruin linen.

Step-by-Step Guide to Cleaning Upholstery
Cleaning upholstery isn’t just a quick wipe-down. It’s a detailed process that, when done right, enhances the lifespan of your home furniture and restores its original beauty. Below is a comprehensive guide covering every critical phase of the process.
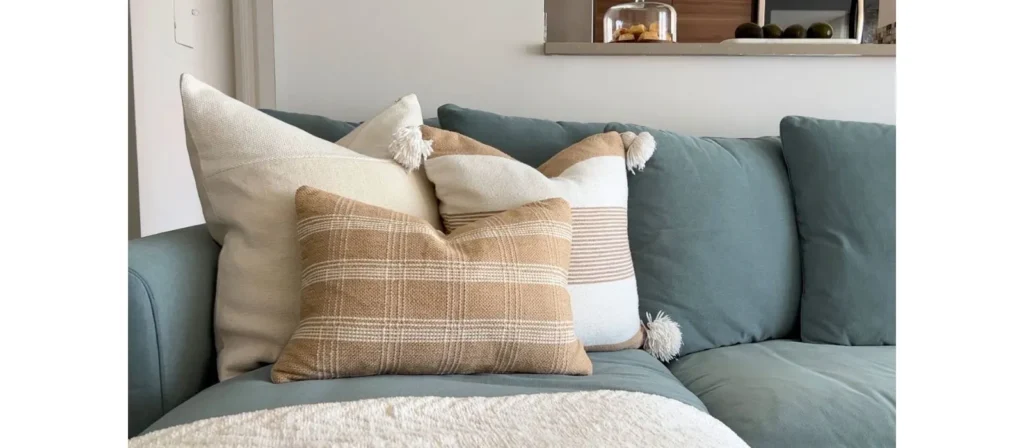
Step 1: Remove Pillows and Blankets
Begin by clearing the entire piece of furniture. Remove throw pillows, blankets, seat cushions (if removable), and any loose fabric accessories. These items often trap dust, dirt, crumbs, and pet hair that can fall into crevices or embed deeper during cleaning if left in place.
Examine them individually—many pillow covers can be machine-washed or spot-cleaned separately depending on their fabric and care labels. Also, check for hidden zippers or fasteners on seat cushions so you can access and clean their covers, if possible.
By starting with a bare surface, you create the ideal condition to Clean Upholstery evenly and thoroughly.
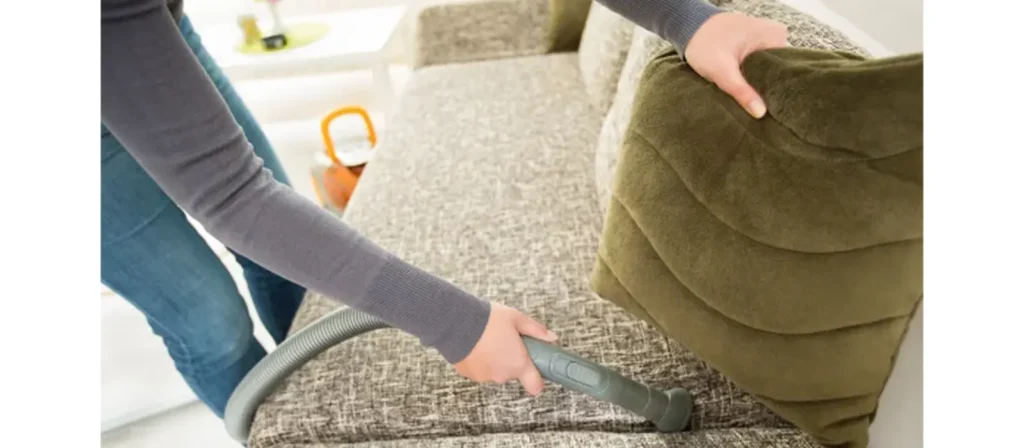
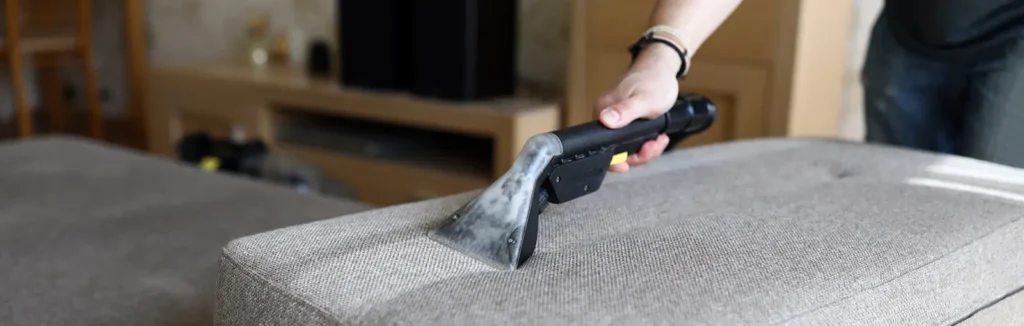
Step 2: Vacuum
Use a vacuum cleaner with an upholstery or crevice attachment to remove surface dust, food particles, hair, and allergens. Pay close attention to seams, corners, and beneath the cushions, as these are hotspots for debris accumulation.
Start from the top and move downward, overlapping each section to ensure complete coverage. For velvety or high-pile fabrics, use a brush attachment that lifts the fibers without pulling them out.
- Use the upholstery attachment to clean all exposed areas.
- Focus on creases, seams, and under cushions.
- Vacuum slowly to allow strong suction and reduce re-depositing particles.
This pre-clean removes 70–80% of the surface contaminants and prepares the material to absorb cleaning agents more effectively. If you skip this step, your attempt to Clean Upholstery may grind dirt deeper into the fabric.
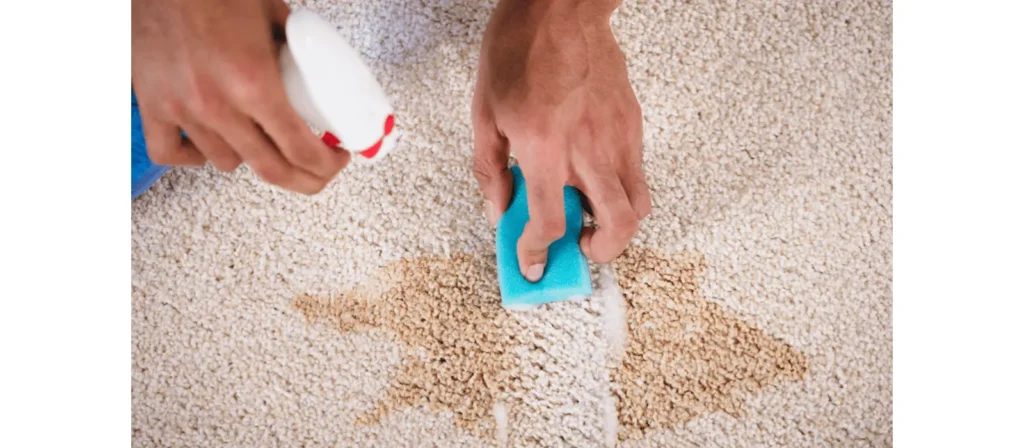
Step 3: Pre-treat Stubborn Stains
Identify specific stains such as wine, coffee, pet urine, or ink. Depending on the stain type, you’ll need to use a targeted cleaner. For example:
- Protein-based stains like milk or blood respond well to enzymatic cleaners.
- Tannin stains such as coffee or tea are best treated with vinegar and dish soap.
- Greasy stains can be absorbed with baking soda before being vacuumed up and then cleaned with a degreaser.
Apply a small amount of cleaner to the stained area and let it sit for 5–10 minutes. Blot with a clean microfiber cloth, working from the outside of the stain inward to prevent spreading.

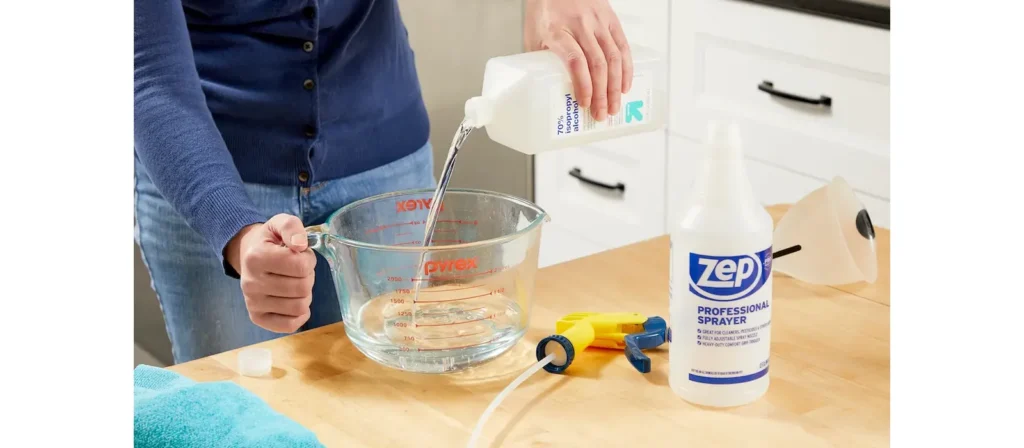
Step 4: Prepare Cleaning Solution
After pre-treatment, it’s time to prepare your main cleaning solution, carefully tailored to your upholstery’s care label.
- For Code W (Water-Based) fabrics: Combine 2 cups of warm distilled water, 1 tablespoon of white vinegar, and a few drops of mild dish soap.
- For Code S (Solvent-Based) materials: Use rubbing alcohol or a specialized dry-cleaning solvent.
- For Code WS fabrics: You may use either method, but always spot test.
- For Code X fabrics: Skip this step entirely; vacuuming and brushing are the only safe methods.
Mix your solution in a clean spray bottle or small basin. Always spot test on a hidden section of your upholstery to observe any negative reactions such as color bleeding, fading, or stiffening. Wait 15 minutes and inspect the results in natural light before proceeding.
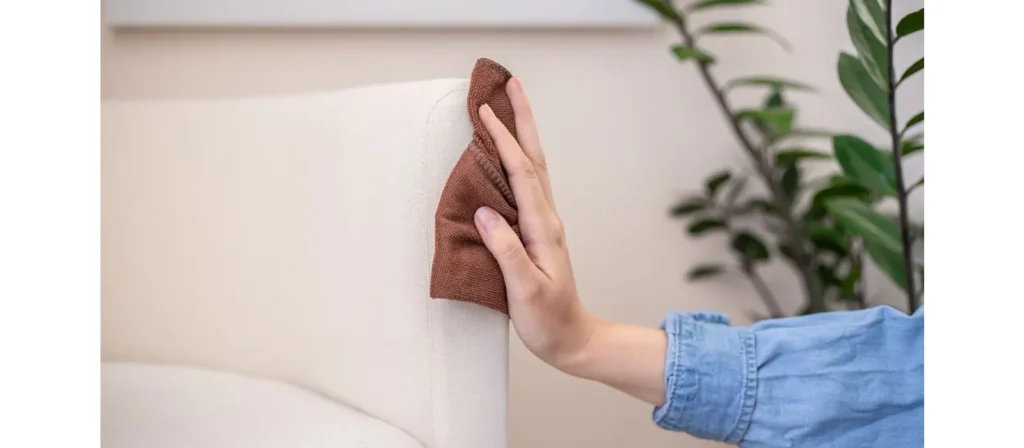
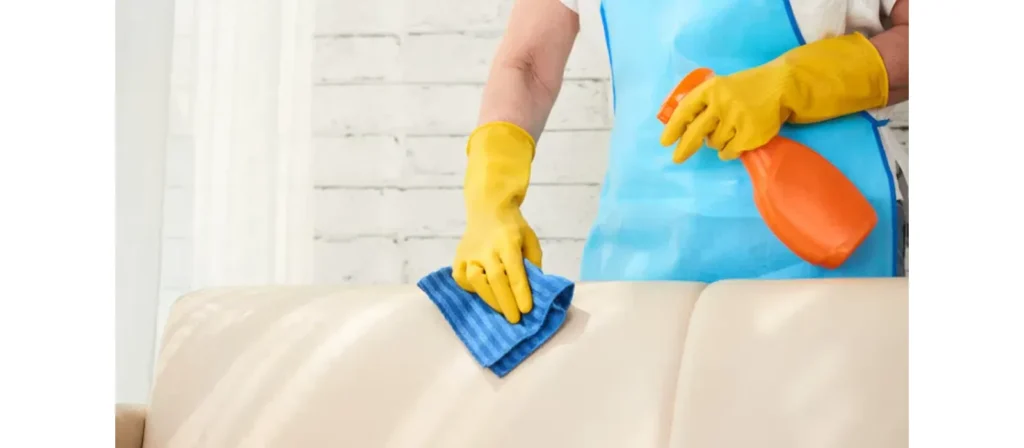
Step 5: Wipe the Fabric
Begin wiping the upholstery by dampening a microfiber cloth or sponge in your cleaning solution. Do not soak it. Gently wipe the fabric in small circular motions, working in sections about 12–18 inches wide.
Tips for this step:
- Start from the top and move downward to avoid dripping over already-cleaned sections.
- Wipe gently—rubbing can break down fibers or spread stains.
- Rinse your cloth frequently in clean water and re-dip into your solution.
If your fabric is textured (like corduroy or chenille), make sure to go with the grain to avoid distortion. For smooth fabrics like microfiber or leather substitutes, use lighter strokes.
This is the main process in Clean Upholstery, and how you do it determines the overall look after drying—so be deliberate and consistent.
Step 6: Treat Stains
Return to previously stained areas if they need additional treatment. Apply another round of cleaner and let it sit for a few minutes longer before blotting again. You may need to repeat this step several times for old or stubborn stains.
Use a paper towel to absorb any remaining moisture, then proceed to neutralize the cleaner with a damp cloth dipped in distilled water.
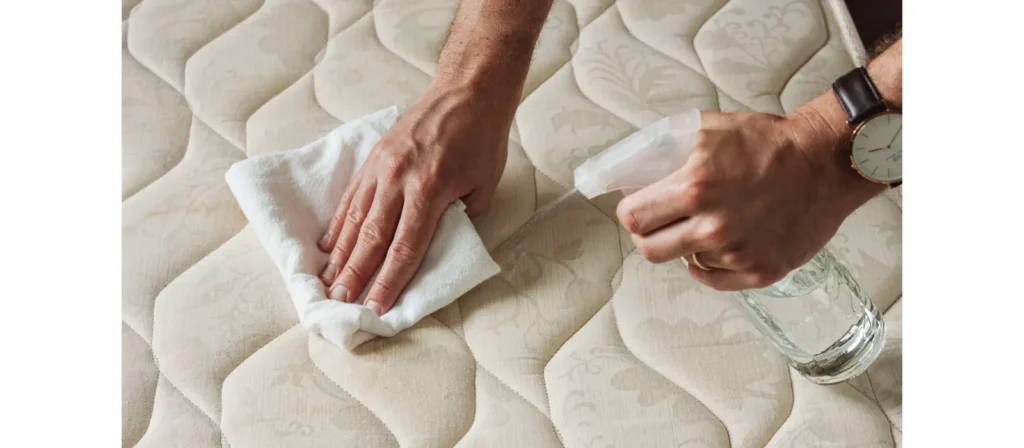
Step 7: Rinse Upholstery
Residual cleaner can attract more dirt or cause discoloration if left behind. Rinsing doesn’t involve soaking but gently wiping the surface with a clean cloth dipped in distilled water. Avoid tap water in this step, as minerals can stain or stiffen the fabric.
Wipe down every section you’ve cleaned, ensuring you remove all soap or chemical traces. If necessary, rinse your cloth between swipes and wring it out thoroughly each time. This step is particularly vital for households with children, pets, or anyone sensitive to cleaning residues.
- Use clean, distilled water: Fill a new spray bottle or a clean cloth with water. Tap water can cause mineral deposits or rings on certain fabrics.
- Light misting or blotting: Lightly spray and immediately blot with a dry microfiber cloth, or dampen a cloth and gently wipe the cleaned areas.
- Work in sections again: Prevent over-wetting by rinsing in the same small areas you cleaned earlier.
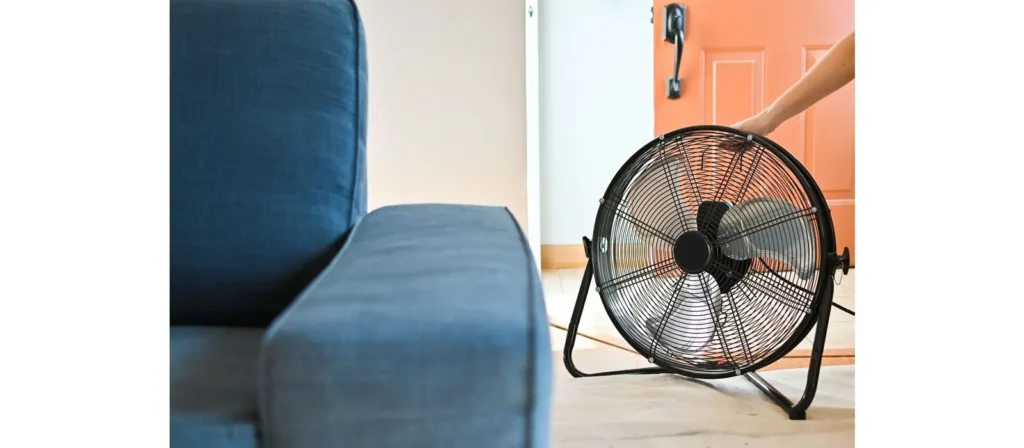
Step 8: Air Dry
The final step—and one of the most important—is drying. Improper drying can undo all your work and introduce new problems like mildew or odors.
Here’s how to do it properly:
- Open windows or turn on ceiling fans for airflow.
- If possible, place furniture in a well-ventilated room, out of direct sunlight.
- Use a standing fan to speed up drying, especially for larger items.
- If drying cushions separately, stand them upright to allow air circulation on both sides.
Never use a heater or blow dryer on high heat. This can shrink fabric, cause cracking (in faux leather), or fade color unevenly. Drying naturally ensures your Clean Upholstery is not only clean but stays in its best shape.
DIY Upholstery Cleaners
Not all stains are created equal. Using a one-size-fits-all approach is a common mistake that can lead to permanent damage or fabric discoloration. The following customized DIY upholstery cleaning methods target specific types of stains with safe, effective solutions that use household ingredients.
Remove General Furniture Stains
For standard dirt marks, food smudges, and mystery spots, a gentle all-purpose cleaner can work wonders without risking fabric damage. Mix:
- 2 cups of warm distilled water
- 1 tablespoon of white vinegar
- 1 teaspoon of mild dish soap
Apply using a clean spray bottle or sponge. Dampen the stained area and gently blot with a microfiber cloth. Repeat as needed, then rinse with a water-dampened cloth and let air dry. This versatile mix is suitable for most fabric types labeled with a “W” or “WS” cleaning code.
Grease Stains
Grease requires a two-step process for best results. Begin by absorbing the oil with a dry powder:
- Sprinkle cornstarch or baking soda generously over the grease spot.
- Let sit for at least 30 minutes to draw the oil from the fabric.
- Vacuum the powder thoroughly.
Follow up by applying a small amount of isopropyl alcohol using a cotton pad or sponge. Blot, never rub. Alcohol breaks down grease without saturating the fabric, making it especially effective for microfiber or polyester upholstery.
Coffee Stains
The acidic nature of coffee makes it stubborn once dried. For fresh stains, act immediately:
- Blot up excess liquid using paper towels.
- Mix 1 tablespoon of white vinegar, 1 tablespoon of dish soap, and 2 cups of lukewarm water.
- Apply the mixture to the stain using a sponge, and blot repeatedly until the stain lifts.
For older stains, you may need to repeat the process twice and follow up with a vinegar-water rinse to neutralize any lingering residue.
Crayon Stains
Children’s artwork doesn’t always stay on paper. Crayon wax can be particularly challenging on fabric. Start by freezing the wax:
- Place an ice cube in a plastic bag and apply it to the stain.
- Once hardened, gently scrape the crayon residue with a dull knife or spoon.
Next, place a paper towel over the stain and press gently with a warm iron (low setting). The heat will melt the wax, which the paper will absorb. Clean the remaining pigment with a mixture of dish soap and baking soda, then rinse.
Blood Stains
Blood should always be treated with cold water—never warm or hot, which sets the protein and makes the stain permanent. Immediately:
- Blot with a cold, damp cloth.
- Mix a solution of 2 parts cold water and 1 part hydrogen peroxide.
- Dab the solution onto the stain with a cloth or cotton pad. Let sit for five minutes, then blot again.
Repeat until the stain fades. Always test peroxide on a hidden area first, as it can bleach certain fabrics.
Red Wine Stains
Red wine is a panic-inducing spill but can be managed effectively if addressed quickly.
- Blot the spill with a clean cloth to absorb as much wine as possible.
- Pour club soda over the stain to dilute the wine.
- Blot again and cover with salt. Let it sit until dry.
- Vacuum up the salt and treat the remaining stain with a mix of dish soap and hydrogen peroxide.
If fabric permits, a steam cleaner can enhance results by breaking down the remaining pigment molecules.
How to Care for Upholstered Furniture?
Maintaining clean, fresh-looking furniture requires more than just emergency stain treatments. Preventive care and routine maintenance are the foundation of any long-term Clean Upholstery strategy.
1. General Maintenance
Routine upkeep is vital to preserving both the appearance and hygiene of upholstery.
- Vacuum weekly using the upholstery attachment to remove dust and debris.
- Rotate cushions monthly to ensure even wear and tear.
- Brush fabrics gently to lift fibers and maintain a fresh texture.
- Use arm covers or throws on high-contact areas to minimize direct exposure.
These simple practices minimize soil buildup and delay deep cleaning needs.
2. Deal with Stains Promptly
Time is of the essence when it comes to stains. The longer a stain sits, the deeper it penetrates into the fabric layers. As a rule:
- Blot — don’t rub.
- Use the appropriate cleaner for the stain type.
- Always rinse afterward to remove any chemical residue.
Train everyone in the household (including children) to report spills immediately. Having a designated cleaning kit nearby can be the difference between a five-minute cleanup and permanent discoloration.
3. Eliminate Odors
Odors can linger in upholstery, especially in homes with pets, smokers, or heavy cooking.
- Sprinkle baking soda on the cushions and let it sit for at least 30 minutes before vacuuming.
- For deeper odor removal, place a small bowl of vinegar near the furniture overnight.
- Lightly mist upholstery with a mix of water and a few drops of essential oil.
Ensure the fabric is compatible with these treatments and always test a hidden area first.
4. Check the Instructions
Always default to the manufacturer’s recommendations. Cleaning codes aren’t just guidelines—they are engineered instructions that align with fabric chemistry. If a label is missing or illegible, research the furniture model or consult a professional before applying any cleaner.
Mistakenly using a water-based solution on a solvent-only fabric can cause irreversible damage like shrinking, warping, or discoloration.
Interior Decoration Taboos
While cleanliness and maintenance are key, your furniture’s environment plays a critical role in its longevity and aesthetic impact. Here are key interior design mistakes that can undermine even the most diligently cleaned upholstery.
1. Placing Upholstered Furniture in Direct Sunlight
UV rays break down fabric fibers, causing fading and brittleness over time. Position sofas and chairs away from south-facing windows or use UV-protective window treatments. Furniture covers can also be rotated seasonally to minimize sun exposure in any one area.
2. Ignoring Ventilation
Placing upholstered pieces too close to walls or in tight corners limits air circulation, allowing moisture and odors to accumulate. Ensure there’s at least a few inches of breathing room around your furniture to promote airflow and prevent mold growth.
3. Overcrowding
Cluttered spaces not only make cleaning more difficult but also increase the likelihood of accidental spills and damage. Arrange furniture with function and flow in mind. Give each piece room to breathe visually and physically.
4. Using Mismatched Cleaning Products
It’s a common but harmful mistake to mix or switch products mid-cleaning. Avoid using general household cleaners, bleach-based agents, or anything not specifically labeled for upholstery use. These products can destroy finishes, damage fibers, or leave behind residues that attract more dirt.
5. Choosing Style Over Function
While delicate silk or velvet sofas look luxurious, they may not be practical for households with pets, children, or high foot traffic. Opt for fabrics that balance beauty with durability, especially for primary-use rooms. Performance fabrics, stain-resistant coatings, and removable covers can preserve both elegance and practicality.
FAQs
- How often should you clean upholstery?
Every 3–6 months for general maintenance, or monthly for high-use areas. - Can I use a steam cleaner on all upholstery?
No, always check the care label. Some fabrics like silk or velvet require dry cleaning. - What’s the best natural cleaner for upholstery?
A mix of vinegar, water, and a drop of dish soap is effective and eco-friendly. - How do you remove pet odors from furniture?
Use enzyme cleaners or baking soda to neutralize odors. - What is the best way to clean fabric upholstery?
Use water-based cleaners with a soft brush and blot gently. - How do I dry upholstery quickly after cleaning?
Use fans, dehumidifiers, or open windows. Avoid sitting on it until fully dry. - How can I make my sofa smell fresh again?
Sprinkle baking soda, let sit for 20 minutes, then vacuum thoroughly. - What’s the easiest way to maintain clean upholstery?
Vacuum weekly, use slipcovers, and spot-clean immediately after spills.
Conclusion
Cleaning upholstery doesn’t have to be a daunting task. With the right tools, a little know-how, and regular maintenance, your furniture can remain fresh, clean, and vibrant for years. Whether you’re dealing with daily dust or a red wine disaster, knowing how to clean upholstery gives you confidence and control over your living space. Invest in quality cleaners, follow smart techniques, and enjoy a healthier, cozier home.